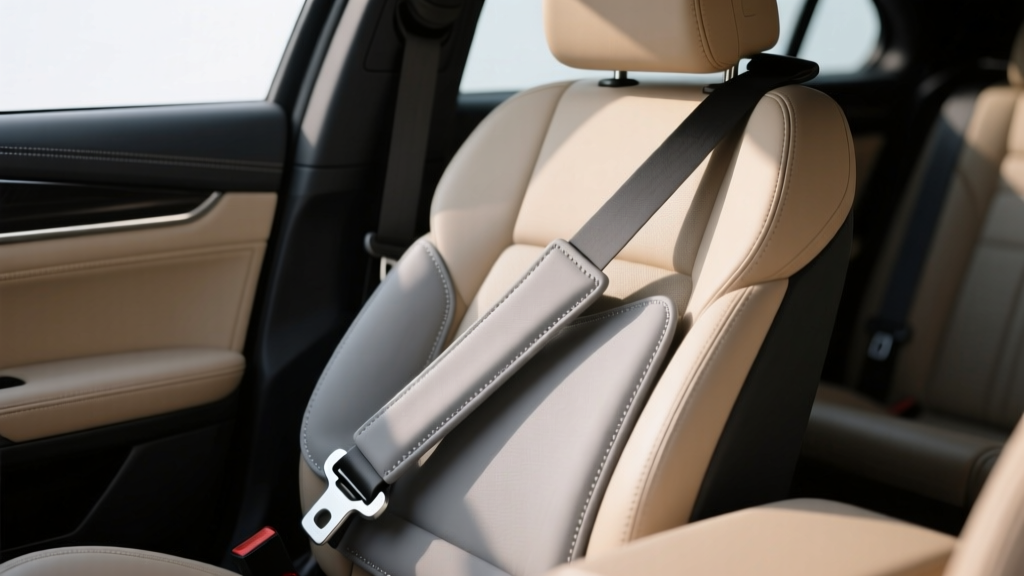
Seat Belt Cover Installation: Step-by-Step (2026)
Step-by-Step Seat Belt Cover Addition Installation Guide ? Part 2
Seat belt covers are one of those small interior upgrades that can make your daily drive noticeably more comfortable. If you?ve ever had a belt rub your neck on a long commute, dig into your shoulder in a stiff jacket, or leave an irritation mark after a road trip, you already understand why this topic matters. A well-chosen cover can soften the contact points without compromising how the belt retracts or sits across your body.
Part 1 typically covers picking the right cover type and doing a basic test fit. Part 2 focuses on getting the installation ?right? in the real world: aligning the cover so it doesn?t twist, ensuring it doesn?t interfere with belt function, tailoring the fit for different body types and child seats, and troubleshooting common annoyances like slipping, bunching, and noisy hook-and-loop closures.
If you want your seat belt cover to feel factory-clean rather than like an add-on you?re constantly adjusting, this guide will walk you through the details that separate a quick install from a solid one.
Before You Start: Safety, Fit, and Compatibility Checks
Know what a seat belt cover should (and shouldn?t) do
- Should: reduce friction on skin/clothing, keep the belt from chafing, and add a bit of padding without changing the belt?s routing across your chest.
- Shouldn?t: add bulk that prevents full retraction, cause the belt to twist, block access to the buckle, or interfere with child seats/boosters.
Airbags and interior safety reminders
- Side airbags: Many vehicles have side airbags in the seat bolsters. Seat belt covers generally don?t affect these, but avoid bulky accessories that press into the seat edge or change how you sit.
- Belt position matters: Even with a cover, the belt should still sit low across the pelvis and diagonally across the chest. Don?t use covers to ?make the belt tolerable? if it?s routed incorrectly?adjust the shoulder anchor height first.
- Child passengers: If the belt doesn?t fit a child correctly, use a booster seat appropriate for their size. A cover is not a substitute for a proper restraint system.
Quick compatibility checklist
- Does your belt fully extend and retract with no sticking?
- Is the cover narrow enough to avoid the B-pillar trim and height adjuster?
- Will it clear the buckle and latch plate without bunching?
- Does your belt have a built-in shoulder pad or guide that could conflict?
Tools and Materials (Most Installs Need Very Little)
- Seat belt cover (Velcro/hook-and-loop, zipper, snap, or slip-on tube style)
- Microfiber towel (to clean the belt and reduce lint under closures)
- Mild interior cleaner or diluted soap solution (avoid harsh chemicals on the belt webbing)
- Small soft brush (optional, for cleaning belt fibers if dusty)
- Scissors (optional, for trimming loose threads on the cover?never cut the seat belt)
Step-by-Step Installation: Dialing In Placement and Feel
Step 1: Clean the belt section where the cover will sit
- Pull the seat belt out until you have a comfortable working length (about 12?18 inches).
- Hold the belt so it stays extended; if your car has a locking retractor mode, avoid engaging it unless you want the belt to stay fully locked while you work.
- Wipe both sides of the belt webbing using a microfiber towel lightly dampened with mild cleaner.
- Let it air dry for a minute before attaching the cover.
Practical tip: A clean belt grips better under a cover and reduces ?creeping? where the cover slides down over time?especially on smooth nylon belts.
Step 2: Find your ideal comfort zone (real-world positioning)
The best position is usually where the belt contacts your neck/shoulder area?but not so high that the cover hits the height adjuster or rubs the B-pillar trim.
- Sit in your normal driving posture.
- Buckle up and adjust the shoulder anchor height (if equipped) so the belt crosses the middle of your shoulder, not your neck.
- Pinch the belt where you want the padding to start?typically 1?3 inches below where the belt leaves the shoulder anchor.
- Mark the spot mentally (or with a removable clip on the belt?avoid markers/ink).
Real-world example: If you drive in business attire, you may want the cover slightly lower to prevent rubbing on collar edges. If you drive in T-shirts, you may prefer it higher to stop direct skin contact.
Step 3: Install by cover type (Velcro, zipper, snaps, or slip-on)
Velcro (hook-and-loop) seat belt covers
- Open the cover fully and lay it flat behind the belt.
- Center the belt on the padding area so the cover wraps evenly on both sides.
- Wrap the cover around the belt, keeping the belt flat (no twists).
- Press the hook-and-loop strip together from one end to the other to prevent puckering.
Comfort tip: Position the ?hook? (scratchy) side so it doesn?t face your neck or snag delicate clothing. Many covers are reversible?test which direction feels smoother against your skin.
Zipper seat belt covers
- Open the zipper fully.
- Place the belt inside the cover?s channel without folding the belt.
- Zip slowly while keeping fabric from catching in the zipper teeth.
- Rotate the cover so the zipper line faces away from your neck for best comfort.
Noise tip: Zippers can lightly rattle against the belt latch plate depending on placement. Keep the cover a bit higher so it doesn?t touch hardware when the belt retracts.
Snap-button covers
- Align the belt along the center of the cover.
- Close snaps one at a time, starting from the middle and working outward.
- Check that the snaps don?t create pressure points where the belt crosses your collarbone.
Slip-on (tube) covers
- Unbuckle the belt.
- Thread the belt through the tube, moving slowly so the tube doesn?t bunch.
- Slide into position and re-buckle.
Fit tip: Slip-on styles tend to slide more. They work best when the tube is slightly shorter and snug, not loose and long.
Step 4: Confirm full belt function (this is the non-negotiable check)
- Slowly let the belt retract?watch for hesitation or sticking.
- Pull the belt out quickly to ensure the retractor locks (a basic safety test).
- Buckle and unbuckle several times to ensure the cover doesn?t block access to the latch plate or buckle.
- Turn your torso slightly left and right; the belt should move smoothly across the cover without bunching.
If the belt retracts slowly after installation, your cover is likely too bulky or positioned where it interferes with the belt?s path. Reposition it slightly lower or choose a slimmer cover.
Fine-Tuning: Prevent Slipping, Twisting, and Bunching
How to keep a cover from sliding down the belt
- Start with a clean belt: Dusty belts act like ?dry lubricant.?
- Use a snug closure: Hook-and-loop should fully engage; half-engaged Velcro slips faster.
- Position away from the latch plate: Hardware movement can ?walk? the cover down over time.
- Choose shorter covers for daily drivers: Long covers feel plush but can migrate more, especially if they brush the B-pillar.
Fixing a belt twist caused by a cover
- Unwrap and reinstall while holding the belt flat the entire time.
- Check that the cover isn?t pulling more on one edge than the other.
- Make sure the cover?s seam/closure is centered or rotated to a neutral position so it doesn?t ?steer? the belt.
Getting comfortable placement for different drivers
- Tall drivers: Place the cover slightly lower to keep it from hitting the shoulder height adjuster.
- Short drivers: Raise the shoulder anchor first; then place the cover where the belt touches your neck area.
- Broad shoulders: Wider covers can help spread pressure, but check that the belt still retracts cleanly.
- Sensitive skin: Look for soft microfiber, faux sheepskin, or padded neoprene; avoid rough stitching on edges.
Product Recommendations: Choosing the Right Cover for Your Needs
Best for daily commuting (balanced comfort + low hassle)
- Padded neoprene Velcro cover: Durable, easy to remove and wash, typically slim enough for good retraction.
- Microfiber Velcro cover: Softer feel against skin and work shirts; tends to collect less lint than faux fur.
Best for maximum softness (long drives, sensitive neck/skin)
- Faux sheepskin wrap: Very soft and insulating, great for road trips; can be bulkier and may reduce retraction speed if oversized.
- Plush fleece cover: Comfortable and usually easier to clean than faux sheepskin, but can pill over time.
Best for performance or sporty interiors
- Alcantara-style or suede-look cover: Premium appearance and good grip; ensure edges are smooth to avoid abrasion.
- Leather or leatherette cover: Clean look, easy to wipe down; can feel firm unless padded well.
Quick comparison table (what you?ll notice day-to-day)
- Velcro: easiest install and adjustment; potential scratchiness if oriented wrong; can snag knits.
- Zipper: clean look and secure; can be noisy or feel firm along the zipper line.
- Snap: secure and tidy; pressure points possible if snaps sit where the belt contacts your body.
- Slip-on tube: sleek and no closures; most prone to sliding unless snug.
Common Mistakes to Avoid (and How to Fix Them)
- Placing the cover too high: It can hit the shoulder anchor and bunch. Fix: slide it down 1?2 inches and retest retraction.
- Covering the latch plate area: Makes buckling awkward and can cause the cover to drift. Fix: keep the cover on the shoulder section only.
- Choosing a cover that?s too bulky: Retraction slows, and the belt may not sit flat. Fix: switch to a slimmer padded cover or shorter length.
- Ignoring belt twists during install: Twists reduce comfort and can affect belt positioning. Fix: unwrap and reinstall while keeping the belt flat.
- Letting rough Velcro face your neck: Annoying on bare skin and can irritate. Fix: rotate the cover so the soft side faces you.
- Using adhesives or clips on the belt webbing: Not recommended; can damage fibers. Fix: rely on proper fit and closure tension instead.
Maintenance and Cleaning: Keep It Comfortable and Odor-Free
Routine care
- Remove and shake out debris every couple of weeks (especially plush or fleece covers).
- Spot-clean with mild soap and water; air dry fully before reinstalling.
- Check closures for lint buildup; clean Velcro with a soft brush for better grip.
When to replace a cover
- Padding has flattened so much that comfort is gone.
- Stitching is unraveling and could snag the belt.
- Velcro no longer holds securely and the cover slides constantly.
FAQ: Seat Belt Cover Installation and Use
1) Do seat belt covers affect safety?
A properly installed cover that doesn?t change belt routing, doesn?t add excessive bulk, and doesn?t interfere with retraction or locking shouldn?t affect normal use. The key is testing full extension, retraction, and locking after installation and keeping the belt flat across your body.
2) Why does my seat belt cover keep sliding down?
Common causes are dust on the belt, a loose closure, or a long/heavy cover that gets pushed by the latch plate and retraction cycle. Clean the belt, tighten the closure, and position the cover higher on the shoulder section?away from hardware.
3) Can I use a seat belt cover with a child seat or booster?
For boosters that use the vehicle belt, you want the belt to move freely and sit correctly on the child. A cover may add bulk or change how the belt lays. If you?re using one, keep it away from belt guides and test belt fit carefully. When in doubt, skip the cover for that seating position.
4) What?s better: Velcro or zipper?
Velcro is easier to adjust and remove for cleaning, making it a top choice for most drivers. Zippers look cleaner and won?t snag like hook-and-loop can, but they can feel firm along the zipper edge. If comfort is the priority, a soft, padded Velcro wrap is often the best starting point.
5) My belt retracts slowly after installing the cover?what should I do?
First, reposition the cover slightly lower and make sure it?s not rubbing the B-pillar trim or the height adjuster. If it still retracts slowly, the cover is likely too thick for your belt path. Switch to a slimmer design or a shorter length.
6) How do I stop Velcro from scratching my neck?
Rotate the cover so the soft loop side faces your body, and keep the hook side facing outward. If the cover design exposes hook edges, consider a zipper or snap style, or a Velcro cover with a fabric flap that shields the hook strip.
Next Steps: Make the Upgrade Feel Factory-Clean
Once your seat belt cover is installed, do a quick ?week one? check: pay attention to whether it slides after a few drives, whether it changes how the belt sits on your shoulder, and whether retraction remains smooth when you exit the car. A small repositioning early on usually solves 90% of the minor annoyances people blame on the cover itself.
- Re-check belt routing and shoulder anchor height for your driving posture
- Test lock/retract function after any adjustment
- If you share the car, consider a cover that?s easy to move between drivers
Want more practical interior upgrades like this? Browse the latest guides and how-tos on carinteriormix.com and keep your cabin comfortable, clean, and tailored to the way you drive.